
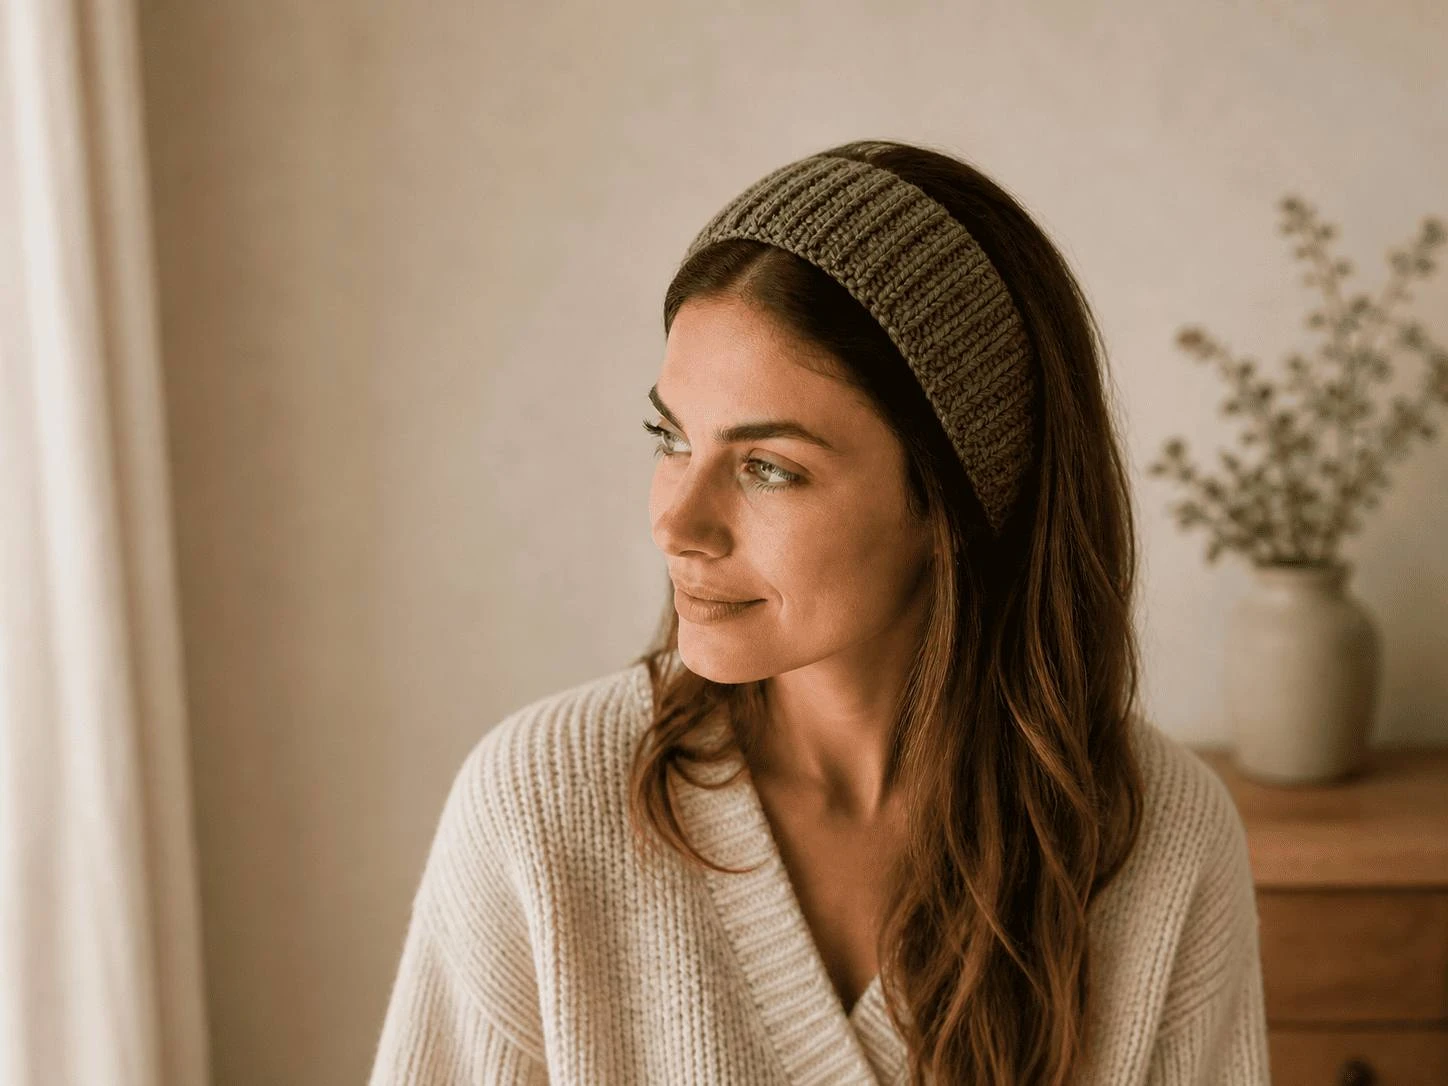
Crochet Basic Hairband:
The Beginner Pattern You’ll Actually Finish
None of that means you’re bad at crochet. It means the projects were too big. Nobody stays confident for forty hours with no evidence coming back, and a beginner handed a blanket is being asked to do exactly that.
So start smaller. A crochet basic hairband uses about fifteen grams of yarn — roughly a seventh of one skein — and takes an evening. Two stitches, no joining, no seaming, nothing worked in the round. At the end you have something you can put on your head and wear out of the house, which is a very different feeling from finishing a practice swatch.
Below you’ll find the full pattern, a size chart built for a tie-style band, and the one moment where this project usually goes sideways — plus how to stop it. If you want more beginner makes after this one, they are all in our crochet patterns.
What Makes This Crochet Basic Hairband Different
Why Tie-Style Beats Pull-On for a First Project
Most beginner headbands are pull-on: a loop, joined at the back, staying put through sheer tension. This one ties. That distinction matters more than it sounds, and it matters most on a first project.
A pull-on band gives you two ways to get it wrong. Your gauge has to be right, and your guess about how much the fabric will stretch has to be right. Miss either one and you’ve made something that either squeezes your temples or slides off the back of your head.
A tie-style band gives you neither problem. Come out three centimeters short? Pull the bow a bit tighter. Nobody will ever know.
| Feature | Tie-Style (this pattern) | Pull-On |
|---|---|---|
| Sizing forgiveness | High — the ties absorb any error | Low — must match gauge closely |
| Beginner difficulty | Easier — worked flat, never joined | Harder — requires joining without a twist |
| Adjusts to hair volume | Yes, every time you wear it | No |
| Comfort over a long day | No pressure points | Can pinch behind the ears |
| Failure mode | Bow works loose | Too tight (headache) or slides off |
Hairband or Ear Warmer? They’re Not the Same Thing
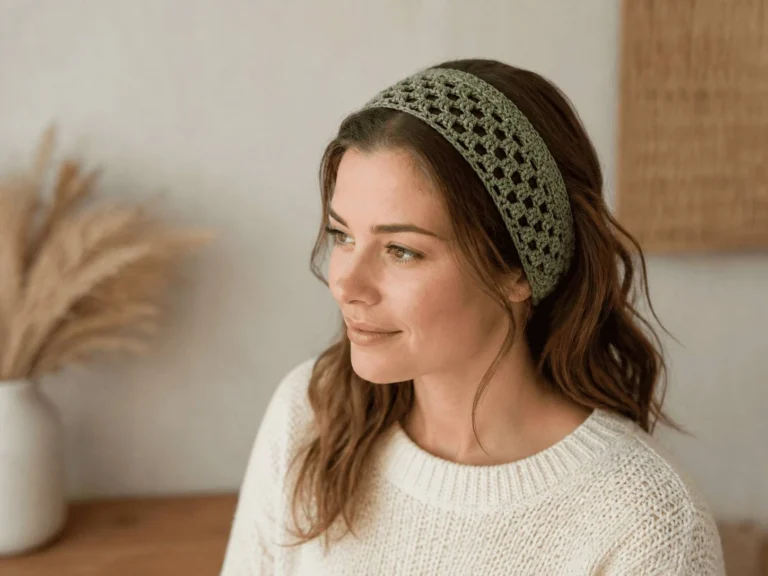
These get conflated constantly in search results. An ear warmer is 8–10 cm wide, joined in the round, and built for January. This band is 4–5 cm wide and decorative — it keeps your fringe off your face, not your ears warm. Looking for something warmer? Browse the crochet section for cold-weather projects.
What You Need to Crochet a Basic Hairband
Three things, and you probably own two of them already.
| Material or Tool | Specification | Notes |
|---|---|---|
| 🧶 Yarn | Medium weight (CYC Category 4), ~15 g | Sample uses Lion Brand 24/7 Cotton in “Bay Leaf” |
| 🪝 Crochet Hook | 4 mm (US G/6) | Deliberately tighter than standard — it stops a narrow band going floppy |
| ✂️ Scissors | Any sharp pair | Embroidery scissors give the cleanest trim on the tails |
| 📏 Tape Measure | Standard fabric tape | Optional, but you’ll want it for the ear-to-ear measurement |
| 📌 Stitch Markers | 2–3, optional | Drop one every 10 chains so you never lose count on the ties |
Choosing Your Yarn
- Cotton (top pick): Shows the stitch pattern clearly, barely gives, and grips hair instead of sliding around. Mercerized cotton is what the sample uses.
- Acrylic: Costs less and feels softer, but expect some sag by evening — it stretches more and recovers less.
- Wool: Lovely to work with, warm, and it pills where it rubs your hairline.
- Skip entirely: Anything fuzzy, boucle, or chenille. The look of this band is the visible stitch definition, and fluff erases it.
Hook Size at a Glance
| Hook | Yarn Weight | Result |
|---|---|---|
| 3.5 mm | Light (CYC 3 / DK) | Finer band — work 9 stitches wide to match, and add ~29% more rows |
| 4.0 mm | Medium (CYC 4 / worsted) | The sample — 7 stitches wide, 29 rows |
| 5.5 mm | Bulky (CYC 5) | Chunkier band — 5 stitches wide, about 29% fewer rows |
Hook sizes here are scaled from this pattern’s 4 mm. Swatch before committing.
The Stitches and Abbreviations You’ll Use
Two stitches carry the entire pattern: chain and double crochet. Everything else — the increases, the decreases — is just those two placed differently.
| Stitch | US Term | UK Equivalent | Where You’ll Use It |
|---|---|---|---|
| ch | chain | chain | Both ties, and the turning chain at the start of every row |
| dc | double crochet | treble crochet (tr) | Every stitch of the band itself |
| dc2tog | double crochet 2 together | tr2tog | Rows 27–29, shaping the second point |
| sk | skip | miss | The first stitch of each decrease row |
| st / sts | stitch / stitches | stitch / stitches | Throughout the pattern chart |
How to Work a Double Crochet
- Yarn over, then insert your hook into the stitch
- Yarn over and pull through — 3 loops on your hook
- Yarn over, pull through 2 — 2 loops on your hook
- Yarn over, pull through the last 2 — 1 loop left
The rhythm to memorize is yarn over, in, through, through, through. From row 2 onward you’ll work into the tops of stitches rather than chains — look at the top edge and you’ll see small V shapes, one per stitch. Your hook goes under both legs of each V.
How to Size Your Crochet Hairband
Most headband guides hand you a head-circumference chart. Your band doesn’t go around your head, though — it goes over it, so that’s the wrong number.
Measure from the top of one ear, across the crown, to the top of the other ear. That arc is your band length. For an average adult that’s roughly 31 cm (12.2 in), which works out to 29 rows. The ties add length past that and don’t need measuring at all.
Size Chart by Age
| Who It’s For | Head Circumference | Band Length | Rows |
|---|---|---|---|
| 6–12 months | 40.5 cm / 16 in | ~22 cm / 8.7 in | 21 |
| 2–5 years | 48 cm / 19 in | ~26 cm / 10.2 in | 24 |
| Child | 51 cm / 20 in | ~28 cm / 11.0 in | 26 |
| Teen / Adult S | 53 cm / 21 in | ~29 cm / 11.4 in | 27 |
| Adult M — the sample | 56 cm / 22 in | 31 cm / 12.2 in | 29 |
| Adult L | 58.5 cm / 23 in | ~32 cm / 12.6 in | 30 |
Band length runs at about 55% of circumference. Row counts are calculated at roughly 1.07 cm per row — check yours against a swatch.
Crocheting for someone you can’t measure? Use the chart. Making it for yourself? Hold the band against your head every few rows and stop when it reaches.
The Free Crochet Basic Hairband Pattern
Five stages: chain the first tie, widen over three rows, work straight to fit, narrow over three rows, then chain the second tie.
The Pattern Chart
| Row | Instruction | Sts |
|---|---|---|
| — | Slip knot, ch 45 (first tie) | 45 ch |
| — | Tighten that last chain, ch 2 | — |
| 1 | 3 dc into the tightened chain (no turn) | 3 |
| 2 | Ch 2, turn, 2 dc in first st, dc in next, 2 dc in last | 5 |
| 3 | Ch 2, turn, 2 dc in first st, dc in next 3, 2 dc in last | 7 |
| 4–26 | Ch 2, turn, dc in each st across | 7 |
| 27 | Ch 2, turn, sk first st, dc in next 4, dc2tog | 5 |
| 28 | Ch 2, turn, sk first st, dc in next 2, dc2tog | 3 |
| 29 | Ch 2, turn, sk first st, dc2tog | 1 |
| — | Ch 45 (second tie), fasten off, trim to 2.5 cm | 45 ch |
Phase 1: Chain Your First Tie
- Make a slip knot and place it on your hook
- Chain 45, which comes out around 24–26 cm (9.5–10 in)
- Think of this length as ear-to-knot, plus enough spare for a bow. Want longer ties? Chain more — just write your number down, because the second tie has to match
Phase 2: Rows 1–3, Building the Triangle
- Row 1 puts three double crochets into the tightened chain — not the ch 2 you worked after it. Your hook goes back down into that small tight chain underneath
- Row 2: ch 2, turn, then 2 dc in the first stitch, 1 dc in the next, 2 dc in the last → 5 sts
- Row 3: same shape, with three plain stitches in the middle instead of one → 7 sts
Your count runs 3 → 5 → 7. Both increase rows work the same way: double up at each end, single stitches through the middle.
Phase 3: Rows 4–26, The Straight Band
Ch 2, turn, one double crochet in every stitch. Seven stitches. Twenty-three times. This stretch is the good part — put something on in the background.
- Count to seven at the end of each row for the first several rows, until your hands stop needing you to
- Hold the band against your head every five rows or so — that first triangle sits behind one ear, so use it as your anchor point
- Crochet stretches. Caught between two row counts? Take the shorter one. A slightly short band still ties; a slightly long one slides around all day
Phase 4: Rows 27–29, The Second Triangle
Now you mirror the opening, decreasing instead of increasing. Every one of these rows opens the same way: ch 2, turn, then skip the first stitch. That skip is what makes the slant — leave it out and you get a blunt end instead of a point.
- Row 27 — skip 1, dc in next 4, dc2tog over the last two → 5 sts
- Row 28 — skip 1, dc in next 2, dc2tog over the last two → 3 sts
- Row 29 — skip 1, dc2tog over the last two → 1 st. This row is the decrease on its own, with no plain double crochets left
Phase 5: Second Tie, Then Finish
- Chain 45 to match your first tie
- Try it on before you fasten off. While that loop is still live you can add rows, take rows out, or lengthen a tie. The moment you cut, all of that is gone
- Happy with the fit? Cut the yarn short and pull the tail through your last loop, then pull tight to lock it
- Trim both tails to about 2.5 cm (1 in). No weaving in — the knots hold and the tails vanish into the ties
How to Stop a Hole Forming in Row 1
Before you work row 1, tighten the final chain. Hold your thumb on it, pull the working yarn with your index finger until the chain shrinks to almost nothing, then work all three double crochets into it.
Think about what row 1 is actually asking. Three double crochets, all forced into one chain stitch. A chain worked at normal tension can’t take that — it spreads open under the pressure, and you get a hole sitting exactly where it’ll be visible beside your ear.
- Finish your 45 chains
- Put your thumb on the last chain and leave it there
- Pull the working yarn with your index finger until that chain shrinks
- Chain 2, thumb still in place
- Work all three double crochets into the tightened chain, going under the ch 2 to reach it
Your thumb is doing real work here. Once that chain tightens it becomes almost impossible to spot, and you’ll be hunting for something the size of a pinhead.
Fixing What Usually Goes Wrong
| What You’re Seeing | Why | What to Do |
|---|---|---|
| Band widening every row | You’re counting the turning chain as a stitch | Count 7 sts at the end of each row. First dc goes into the first stitch, not the chain |
| Band narrowing every row | You’re missing the last stitch of the row | Work that final dc right up against the turning chain — it’s easy to skip |
| Hole at the pointed end | You didn’t tighten the chain before row 1 | See Section 6. Thumb stays put |
| Edges curling | Turning chains worked too tight | Loosen the ch 2, or move up half a hook size |
| Ties different lengths | You counted chains by eye | Drop a stitch marker every 10 chains |
Those first two are the same mistake in mirror image, and understanding them beats memorizing the fix. Narrowing tends to catch you right after you’ve learned about the first problem — told the turning chain doesn’t count, you stop working into the final stitch as well. That last stitch still needs a double crochet of its own.
How to Wear Your Finished Hairband
- Sit the band over the top of your head, wide section across the crown
- Bring both ties forward, passing them under your hair rather than over
- Tie a knot, then tie a bow
- Tuck the tapered ends behind your ears, and pull out a couple of face-framing pieces if you want them
Three Ways to Wear the Same Band
- Classic: bow at the nape, tucked under your hair — the version in the tutorial
- Bandana: knot at the side above one ear, ties left showing
- Pushed back: worn further back like a headscarf, which is the most forgiving option on second-day hair
Frequently Asked Questions
Your First Finished Project Is One Evening Away
Go back to that drawer for a second. This is the project that doesn’t end up in it.
Chain 45, three rows out to a triangle, straight until it spans your head, three rows back to a point, chain 45 again. That’s everything, and you can be wearing it by the end of the evening.
The band itself is almost beside the point. What you’re really making is proof that you can start something and finish it, which is the thing that scarf never gave you a chance to learn.
Keep these close while you work:
- Tighten that final chain before row 1 — thumb stays on it, and you avoid the one visible flaw this pattern can produce
- Try it on before you fasten off — everything is still fixable while the loop is live
- Count to seven at the end of every straight row until your hands take over
- Err short rather than long, because the fabric stretches with wear
- Make a second one straight after. It’ll take you half as long, and that’s the moment you stop being a beginner. Then pick your next project from the crochet patterns library
Pick your color and cast on tonight
Count out 45 chains and make one this evening. Then come back and tell me how it went in the comments — what yarn you picked, what tripped you up, whether you went wider than seven stitches. I read every one, and the questions people ask here are what shape the next tutorial.
Save This Pattern & Start Tonight
6 Comments