How to Crochet an Easy Mesh Bandana With a Picot Border
You have a ball of cotton yarn in your basket, a free afternoon, and a nagging feeling that everything you know how to crochet is either a granny square or a scarf. You want something you would actually reach for on a hot day walking to the farmers market, and you want it to look like it came from a boutique, not a first attempt.
That gap between “I can chain and single crochet” and “I made this gorgeous, lacy thing” feels bigger than it is. Open mesh work has a reputation for being advanced. It is not. It is one of the most forgiving stitch patterns in crochet, because every row is the same four moves repeated until you stop thinking about them.
This crochet mesh bandana pattern runs on exactly that kind of rhythm: a single crochet, a chain of five, another single crochet, another chain of five, and one anchoring double crochet to close the row. Four rows in, your hands will know the sequence better than your eyes do. The picot border at the end is the only new skill here, and it is genuinely just a small loop and a slip stitch.
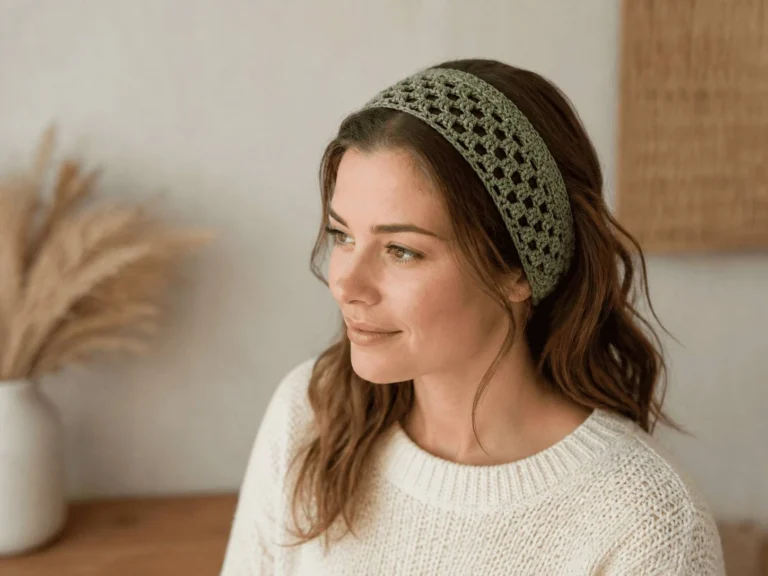
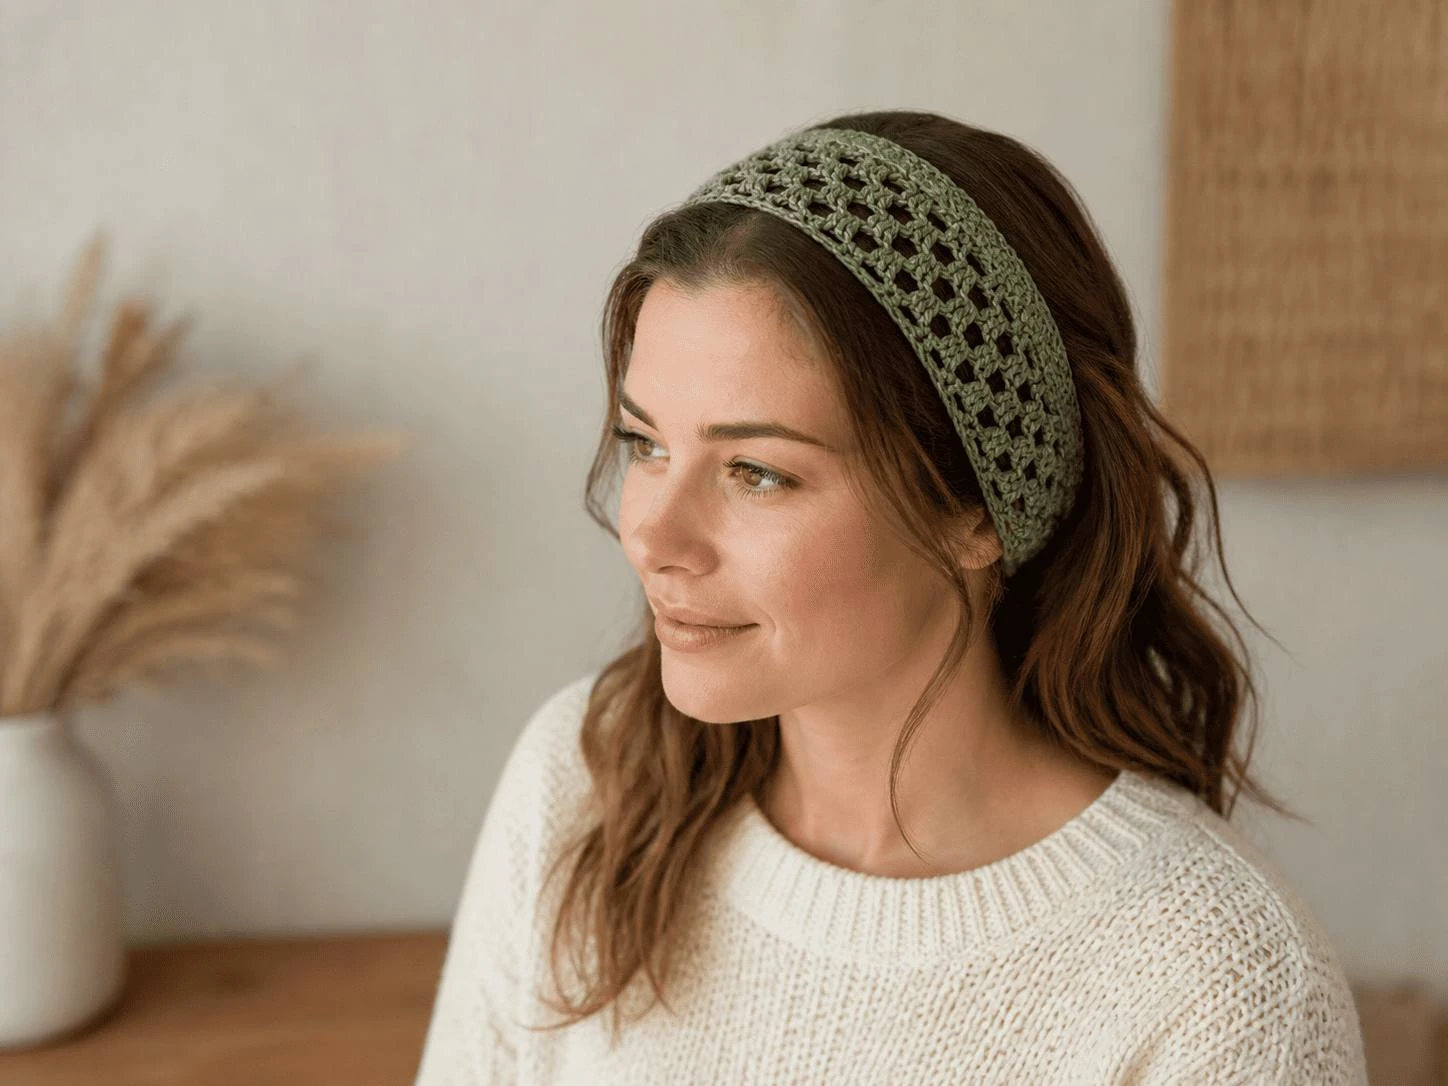
By the time you fasten off, you will have a lightweight, breathable triangle of open mesh with a delicate, bobbled edge — a bandana you will tie on all summer.
Meet the Mesh Bandana
A crochet mesh bandana is a triangular piece of fabric built from open chain-5 spaces divided by short columns of single and double crochet, finished with a picot border on both slanted edges and a dense row of single crochet along the top. The open spaces make it a mesh rather than a solid fabric: chain-5 gaps let air through and let it drape instead of stiffen. It ties on the way a woven bandana does, but moves the way only crochet lace can.
Three parts work together:
- The body — rows of chain-5 mesh spaces, widening from the foundation chain to the top edge.
- The side border — an alternating picot-and-plain trim down both slanted edges, point to top corner.
- The top edge — three single crochets in every chain-5 space, for a firm edge to tie or attach ties to.
You already know how to chain, single crochet, and double crochet — the only stitch you have not met is the picot, and it takes about two repeats to feel natural. That is why this works so well as a first mesh piece: familiar stitches, a rhythm that reads as far more advanced than it is to make.
Materials & Tools
This is a low-commitment project — a single skein of worsted weight (Craft Yarn Council category 4) yarn covers an adult-sized bandana with plenty left over.
| Item | Specification | Notes |
|---|---|---|
| Yarn | Worsted weight (category 4) | Cotton or a cotton-acrylic blend, roughly 50–100g |
| Crochet hook | 3.5mm (US size E/4) | A slightly loose, flowy mesh; size up for airier drape |
| Scissors | Sharp, small blade | For clean cuts at yarn changes and fasten-off |
| Tapestry needle | Large eye, blunt tip | For weaving in yarn tails securely |
| Stitch marker | Any removable type | Marks the first stitch of a row |
Swipe the table sideways to see every column.
Yarn choice changes this project more than hook size does. Cotton drapes; acrylic springs back, and for a piece meant to move in the breeze, that matters.
Stitches You Will Use
Four stitches build the entire bandana. Three you likely already know; the picot is the only new technique here.
| Abbrev. | Stitch | What it does here |
|---|---|---|
| ch | Chain | Builds the foundation and every mesh space |
| sc | Single crochet | Anchors each mesh space; forms the picot border and top edge |
| dc | Double crochet | Closes each row and opens the next mesh space |
| slst | Slip stitch | Closes the loop of each picot bobble |
| picot | Ch 3, slst in base | The small decorative loop that forms the bobbled border |
Swipe the table sideways to see every column.
How to work a picot
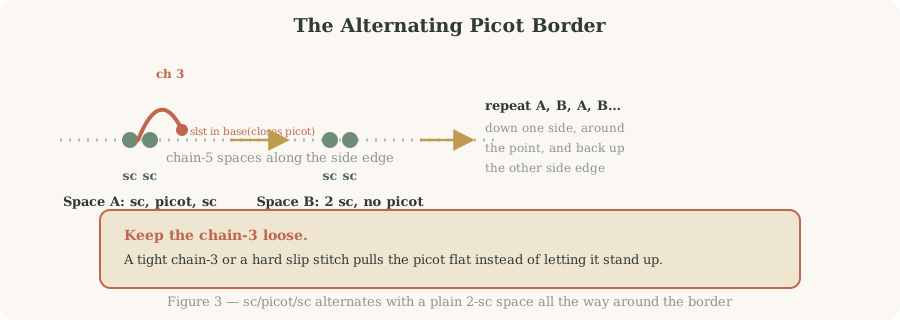
A picot is a tiny detour: chain 3, then slip stitch into the base of that chain-3 to close the loop. It stands proud of the fabric because it is anchored at only one point. Every picot here sits between two single crochets in the same chain space: sc, picot, sc.
- Work one single crochet into the chain space as usual.
- Chain 3.
- Insert your hook under both loops at the base of that chain-3 and pull through to complete a slip stitch — the loop now stands up on its own.
- Work one more single crochet into the same chain space to finish the picot.
Sizing Your Bandana
Because the whole body is one repeating row pattern, sizing is a matter of two decisions: how many chains you start with, and how many rows you work before switching to the border. There is no shaping to calculate.
- Decide the finished top-edge width — your starting chain count, a multiple of 5 plus a few extra for the turn.
- Work the foundation chain and Row 1, then measure that mesh space to see how much length each added row contributes.
- Try the piece on after every few rows, measuring point to top edge, and stop once the length feels right.
- Add the picot border only once the body is the length you want — it adds a little extra width and length.
| Size | Foundation chain | Rows before border | Point-to-top length |
|---|---|---|---|
| Pet / small child | 10–15 | 8–10 | 5–6 in |
| Child | 15–20 | 10–12 | 7–8 in |
| Adult (average) | 20–25 | 12–14 | 9–10 in |
| Adult (oversized) | 25–30 | 14–16 | 11–12 in |
Swipe the table sideways to see every column.
Building the Bandana
Step 1 · The Foundation and Row 1
Every mesh bandana begins with a foundation chain and one row that plants the first mesh space and anchors the edge.
- Make a slip knot, wrap it onto your 3.5mm hook, and pull it snug — not tight.
- Chain your foundation: chain 10 (or your chosen width from Section 4), in multiples of 5 plus a few extra for the turn.
- Work the first double crochet into the very first chain you made, the one closest to the slip knot. This stitch becomes the point of the triangle.
- Single crochet into the last chain: skip across the remaining chains and work one single crochet into the last chain, nearest your hook — this opens the first mesh gap.
- Chain 5 to build the first open mesh space.
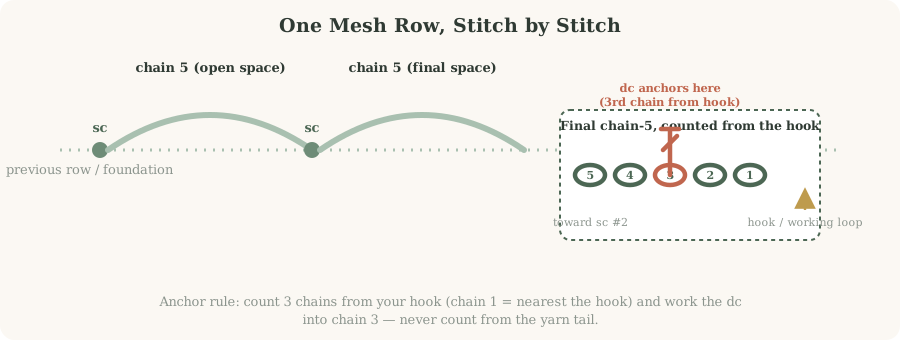
- Anchor the row: count 3 chains back toward your hook on the chain-5 you just made — chain 1 is nearest the hook, chain 2 is next, chain 3 is the one after that — and work one double crochet into that 3rd chain. This locks the row and leaves a short chain-2 tail standing above it, ready for Row 2.
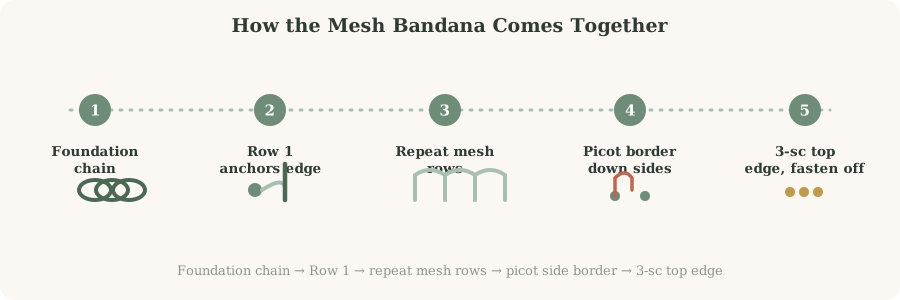
Step 2 · Row 2 and the Repeat
Row 2 sets the pattern you repeat for the rest of the body: chain, turn, work two mesh spaces, and anchor.
- Chain 8 and turn: chain eight stitches, then flip the whole piece to work back the other way. This chain becomes the edge of the next row.
- First space: single crochet into the first chain-5 space from the row below, closest to your hook after the turn.
- Second space: chain 5, then single crochet into the next chain-5 space along the row below.
- Anchor the row: chain 5 one final time. As in Row 1, count 3 chains from your hook and work one double crochet into that 3rd chain to close the row.
Step 3 · Row 3 and Beyond
Repeat Row 2 exactly for every subsequent row: chain 8, turn, sc, ch 5, sc, ch 5, dc into the 3rd chain from your hook to anchor. Continue this one repeat until the body measures the length you chose in Section 4.
Step 4 · The Picot Side Border
The border turns the plain mesh triangle into a finished accessory. Work it down one slanted edge, around the point, and back up the other — never along the straight top edge, which gets its own treatment next.
- Position your hook at the top corner of one side edge and work down toward the point, one chain space at a time.
- Picot space: single crochet into the space, chain 3, insert your hook under both loops at the base of that chain-3 and slip stitch to close the picot, then work one more single crochet into the same space.
- Plain space: work two single crochets into the next chain space, no picot.
- Alternate picot space, plain space all the way down to the point, around it, and back up the second side edge to its top corner.
Step 5 · The Top Edge and Finishing Off
- Once both side edges are bordered and you are back at the straight top edge, work directly across it — no picot here.
- Work exactly three single crochets into each chain-5 space along the entire top edge.
- Cut the yarn leaving a 6-inch tail after your last stitch and pull it through the loop to fasten off.
- Weave in every yarn tail, including the original slip knot tail, through the back bumps of nearby stitches with a tapestry needle.
Troubleshooting, Variations & Care
Troubleshooting
| Problem | Cause | Fix |
|---|---|---|
| Curls at the point | Foundation chain too tight | Use a larger hook for the foundation chain only, then switch back to 3.5mm |
| Picots lie flat | Chain-3 or slip stitch too tight | Loosen your grip while chaining the picot and slip stitch gently |
| Mesh spaces uneven | Inconsistent chain-5 tension | Count each chain-5 aloud to keep a steady rhythm |
| Anchor lands in the wrong chain | Counting from the tail, not the hook | Always count 3 chains from the chain nearest your hook |
| Bandana too small | Not enough rows | Reattach yarn at the top edge and repeat Row 2 until it is long enough |
Swipe the table sideways to see every column.
Variations to try once the mesh feels automatic
- Two-tone border — a contrasting color for the picot border and top edge only, so the body stays solid but the trim pops.
- Longer ties — chain 60–80 stitches at each top corner instead of sewing on ribbon.
- Wider point — a longer foundation chain and more rows before the border, for an oversized kerchief scarf.
- Chunkier drape — a 4.0–4.5mm hook for a looser, heavier drape; size down for denser fabric.
| Task | Approx. time |
|---|---|
| Foundation chain + Row 1 | 5 minutes |
| Picot border, both side edges | 15–20 minutes |
| Total, adult size, average pace | 60–90 minutes |
Swipe the table sideways to see every column.
Caring for your finished bandana
| Care step | Instructions |
|---|---|
| Blocking | Mist with water, pin flat on a towel while stretching the spaces into shape, air dry completely |
| Washing | Hand wash in cool water with mild detergent; avoid wringing, which distorts the mesh and border |
| Storage | Fold flat rather than hanging, so the mesh does not stretch under its own weight |
Swipe the table sideways to see every column.
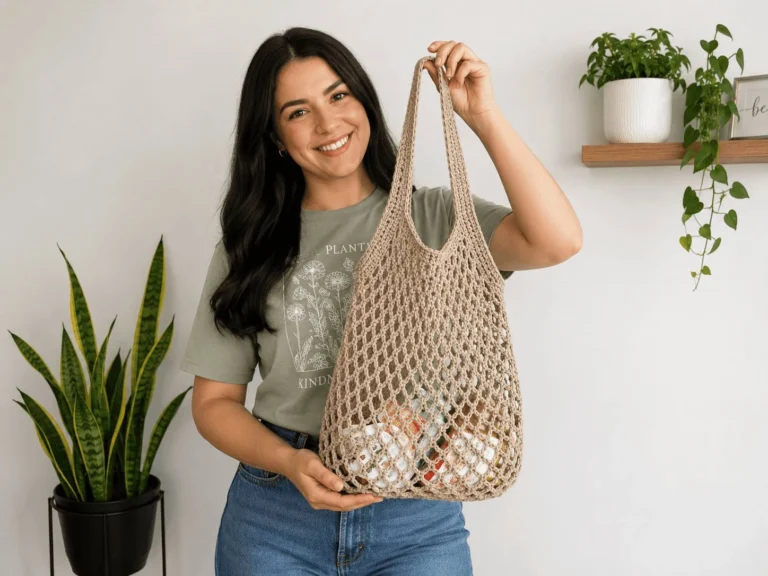
If you enjoyed this chain-space rhythm, the same open, airy construction shows up in our crochet mesh bag pattern, where the identical sc-chain-dc logic builds panels sturdy enough to carry a market haul.
Frequently Asked Questions About the Mesh Bandana
Can I make this bandana larger or smaller?
Is cotton or acrylic yarn better for a mesh bandana?
What exactly is a picot stitch?
Can I use a hook size other than 3.5mm?
How do I attach ties to the bandana?
Why is my anchor double crochet landing in the wrong place?
Do I need to read a crochet chart to follow this pattern?
Can I turn this pattern into a rectangular scarf instead of a triangle?
You Are Ready to Create
That afternoon with a ball of cotton and a free hour is enough to get you from slip knot to a finished, breathable, picot-edged bandana. The rhythm you built row by row through the body carries straight through the border, and the picot that felt unfamiliar at first will feel automatic by the second side edge.
Your quick-start checklist:
- Gather worsted weight cotton (or a cotton blend) and a 3.5mm hook.
- Chain your foundation in a multiple of 5, then work Row 1’s dc-sc-ch5-dc sequence.
- Repeat Row 2’s ch8-sc-ch5-sc-ch5-dc pattern until the body reaches your length.
- Border both side edges with the alternating sc-picot-sc and 2-sc spaces.
- Finish the top edge with 3 sc per space, weave in ends, and block lightly.
Consistent chain tension is the one habit that makes this whole piece look intentional. Take the rows slowly the first time through, let the repeat settle into your hands, and watch the open mesh take shape.
Made your own version?
Tell us the finished point-to-top length you landed on and the yarn you used — it helps other crafters pick a starting chain count that matches their own project.