Crochet Mini Plushie: One Pattern, Four Hooded Animal Friends
You have made one amigurumi before, maybe two, and the sewing-on part is the reason you have not made a third. Little legs that pucker. Arms that end up higher on one side no matter how many times you re-pin them.
This pattern skips that step. Feet and arms are crocheted straight into the body as bobble stitches, popped into place the moment their round is finished — nothing separate, nothing to attach later.
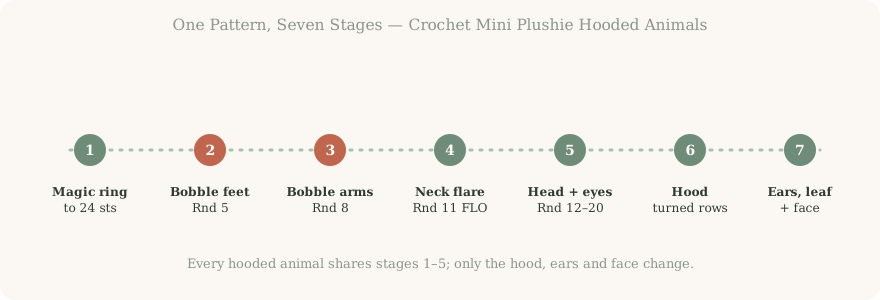
What follows is a crochet mini plushie hooded animals pattern built from one twenty-round body-and-head base. Change the hood, ears and a few lines of embroidery, and the same base becomes a duck, a bear, a cat, or a frog-hooded duckling.
What Is a Crochet Mini Plushie Hooded Animal?
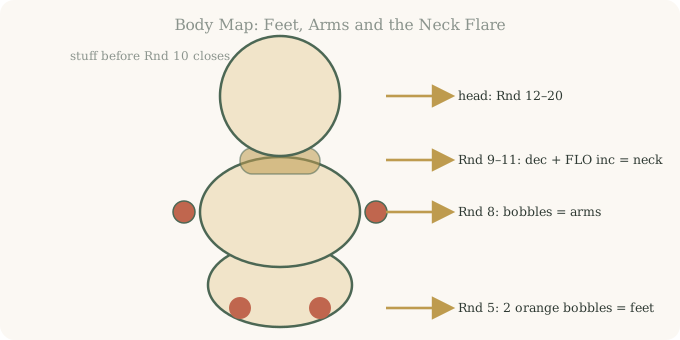
A crochet mini plushie hooded animal is a small amigurumi — about the length of your thumb once finished — built from one continuous body-and-head piece, then dressed with a separate hood, ears and a hand-embroidered face. Feet and arms are bobble stitches worked into Rounds 5 and 8, so the plushie comes off the hook already assembled.
That one decision is what makes this worth learning even if you know a dozen amigurumi patterns already. Most animal amigurumi ask you to sew a body, two arms and two legs together separately. Here, the body is the whole animal; only the hood, ears or leaf, and face are separate, and each takes under two minutes.
- One base, many outcomes: the same 20 rounds become a duck, a bear, a cat or a frog-hooded duckling depending on the hood colour, ear shape and face you add.
- Low-sew construction: feet and arms are bobble stitches worked into the fabric — the only sewing left is the hood, ears, leaf and final crown closure.
- Finished size: about 8–9 cm (3–3.5 in) tall with 5-ply yarn and a 3.5 mm hook, hood included.
- Skill level: beginner-plus — magic ring, increases, decreases, colour changes, the bobble stitch and simple embroidery, all in one small project.
If you have made any amigurumi at all — even a simple crochet octopus amigurumi — you already have every skill this needs. The bobble stitch is the only new move, and it repeats in the same shape both times.
Materials You Need for the Crochet Hooded Duck Bear Pattern
The materials list is short on purpose. One small ball of 5-ply (sport/DK-weight) yarn covers several bodies, and every contrast colour is used in amounts small enough to raid your scrap bin instead of buying new.
| Item | Amount | Notes |
|---|---|---|
| 5-ply yarn, main colour | ~15 g per body | Yellow for duck, beige for bear, grey for cat. |
| Contrast scraps | a few metres each | Orange feet/beak, hood colour, leaf green. |
| 3.5 mm crochet hook | 1 | Tight gauge keeps stuffing from peeking through. |
| Stitch marker | 1 | Mark the first stitch from Round 2 on. |
| 5 mm safety eyes | 1 pair | Or embroider sleepy eyes instead. |
| Craft glue | a dot | For eyes glued on after stuffing. |
| Polyester stuffing | a small handful | Firm fill keeps the head round. |
| Tapestry needle | 1 | Ears, leaf, hood border, tails. |
| Scissors | 1 | Colour changes mean several small cuts. |
Swipe the table sideways to see every column.
Any smooth, worsted-adjacent yarn works, but 5-ply gives the tightest, most stuffing-proof fabric at this scale. To compare weights before shopping your stash, see the Craft Yarn Council’s standard yarn weight system.
Abbreviations and the Bobble Stitch
Every abbreviation in this pattern is standard amigurumi vocabulary, with one new technique doing the heavy lifting: the bobble stitch, which builds the feet and arms directly into the body fabric.
| Term | Meaning | Where it appears |
|---|---|---|
| sc / inc / dec | single crochet / increase (2 sc in one st) / decrease (1 sc over two sts) | Body and hood. |
| ch / sl st | chain / slip stitch | Ears, leaf, hood border. |
| FLO | front loop only | Rnd 11 neck flare. |
| Bobble stitch | (yo, insert, pull up a loop, pull through 2 loops) ×5 in one stitch, then yo and pull through all 6 loops | Feet, Rnd 5; arms, Rnd 8. |
| (…)×6 | repeat six times | Every inc/dec round. |
Swipe the table sideways to see every column.
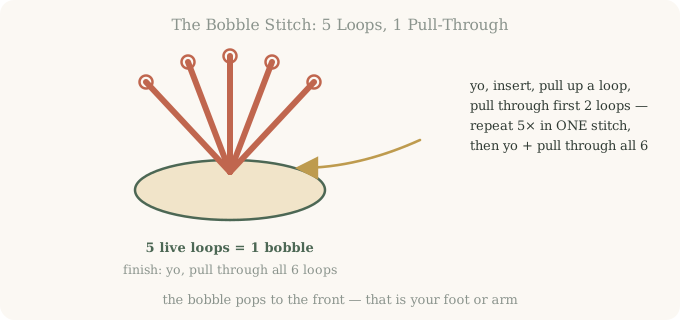
Work the bobble like this: yarn over, insert into the stitch, pull up a loop, then pull through the first two loops on your hook — one partial stitch done, three loops left. Repeat that whole sequence four more times into the same stitch, without finishing any off, until six loops sit on the hook. Yarn over once more and pull through all six together. Give the bump a nudge with your fingertip and it sits proud of the fabric as a foot or an arm.
Sizing Your Crochet Mini Plushie
This pattern is not written to a strict gauge swatch, but the finished size is predictable once you know your hook size and yarn weight.
- Swatch first: work Rounds 1–4 (6→24 sts), lay the disc flat and measure its diameter.
- Compare to the reference: the original Round 4 disc measures about 4 cm across in 5-ply on a 3.5 mm hook.
- Scale the hook, not the round count: a bulkier yarn with a bigger hook keeps the same 20 rounds but grows proportionally.
- Fit the hood last: finish the head, then fit the hood dome over it before the chain border — that step self-corrects most size mismatches.
| Hook & yarn | Finished height | Best for |
|---|---|---|
| 2.5 mm, 4-ply/fingering | 5–6 cm (2–2.4 in) | Earrings, tiny charms. |
| 3.5 mm, 5-ply/DK (as written) | 8–9 cm (3–3.5 in) | Keychains, bag charms, desk companions. |
| 4.5 mm, worsted | 11–13 cm (4.3–5.1 in) | Shelf plushies, sturdier gifts. |
Swipe the table sideways to see every column.
Crochet Mini Plushie Hooded Animals: The Full Pattern
Work the body and head in a continuous spiral, without joining or turning, moving your stitch marker into the first stitch of each new round from Round 2 on. The hood, ears, leaf and face are worked and attached afterward.
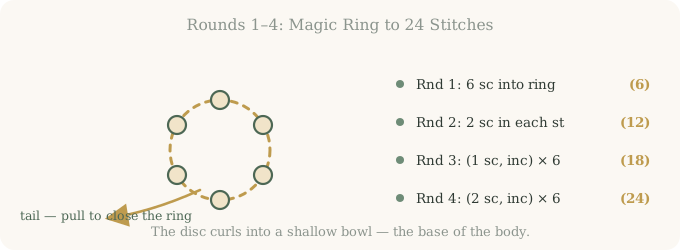
Rounds 1–4: Magic Ring to 24 Stitches
Every animal starts the same way: a magic ring in the main colour, climbed up the classic amigurumi increase ladder.
- Make a magic ring in your main colour.
- Rnd 1: 6 sc into the ring (6). Pull the tail to close.
- Rnd 2: 2 sc into each stitch (12). Place your stitch marker in the first stitch.
- Rnd 3: (1 sc, inc) ×6 (18).
- Rnd 4: (2 sc, inc) ×6 (24). The disc should curl into a shallow bowl — the base of the plushie.
Round 5: Bobble Feet
Round 5 is where the low-sew part of this pattern shows itself: two orange bobbles pop straight out of the fabric exactly where feet belong.
- Work 8 sc in the main colour, changing to orange on the 8th stitch.
- Work 1 bobble stitch in orange, in the next stitch.
- Change back to the main colour and work 5 sc.
- Work the second bobble in orange, change back to the main colour, then work 9 sc to finish the round: 8 + 1 (bobble) + 5 + 1 (bobble) + 9 = 24 sts, matching Round 4.
- Cut the orange yarn, leaving tails long enough to weave in.
Rounds 6–11: Bobble Arms, Then the Neck Pinch
Rounds 6–7 are plain single crochet. Round 8 repeats the bobble trick in the main colour for the arms, and Rounds 9–11 fold the body shut before the neck flares open for the head.
- Rnd 6–7: 24 sc each round, no colour change.
- Rnd 8: 7 sc, 1 bobble, 7 sc, 1 bobble, 8 sc (24) — arms pop out in the body colour, no cutting needed.
- Rnd 9: (2 sc, dec) ×6 (18).
- Rnd 10: (1 sc, dec) ×6 (12). Stuff the body firmly right after, while the opening is still wide.
- Rnd 11: FLO 2 sc into each stitch (24). Working the front loop only flares the fabric into a little shelf — the neck, and the start of the head.
Rounds 12–20: The Head, the Eyes and the Final Close
The head is five even rounds, three decrease rounds, and a sewn close. This is also where the eyes go in.
- Rnd 12–17: 24 sc each round. Keep moving the marker up.
- Eyes: insert 5 mm safety eyes between Rnd 14 and 15, spaced to match the hood opening — or embroider them later instead.
- Rnd 18: (2 sc, dec) ×6 (18).
- Rnd 19: (1 sc, dec) ×6 (12). Stuff the head firmly now, in small pinches.
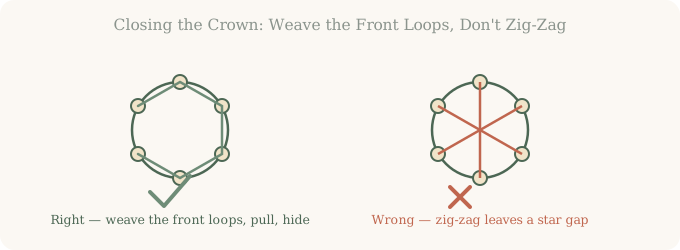
- Rnd 20: 6 dec (6). Cut the yarn with a long tail, weave through the front loops of the six remaining stitches, pull to close, knot inside and bury the tail in the stuffing.
The Hood: A Little Hat with a Face Opening
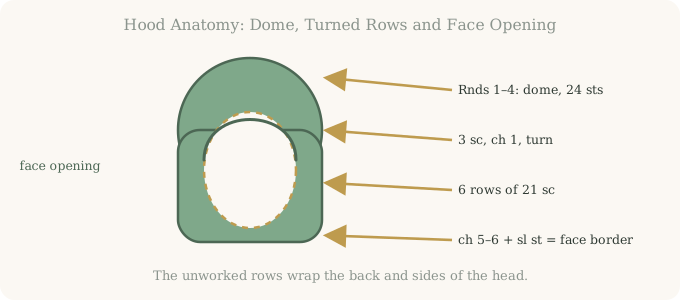
The hood is what turns a plain plushie into a character. It starts as a mini dome using the same Rounds 1–4 as the body, then switches to turned rows, which is what leaves the opening for the face.
- With the hood colour, repeat Rounds 1–4 of the body → 24 sts.
- Work 3 sc, then ch 1 and turn. The remaining 24 − 3 = 21 stitches stay unworked — that gap becomes the face opening.
- Rows 1–6: 21 sc across those 21 stitches every row, chaining 1 and turning at the end of each — each row spans the same 21 stitches, building up the sides and back while the 3-stitch gap stays open.
- Fit the hood over the finished head, then chain 5 or 6 and slip stitch to the other side of the opening, framing the face.
- Chain 1, cut the yarn and weave in every end.
Ears, Leaf and the Face That Decides the Animal
Three tiny extras decide which animal lives under the hood, each taking under two minutes.
Round ears (bear / frog style, make 2)
- Slip knot, chain 2, then 5 sc into the second chain from the hook.
- Slip stitch in the same place, chain 1, cut with a long tail and sew to the top sides of the hood, mirrored.
Pointy ears (make 2)
- Slip knot, chain 3, skip 1, sc 1 in the second chain, chain 1.
- Dc 1 in the next chain, chain 1, sc 1 in the same place, slip stitch, chain 1, long tail; sew on with the dc forming the point.
Leaf (for the apple-hood bear)
- With green yarn, make a magic ring, then (chain 3, skip 1, sc 2, slip stitch) ×3–4 into the ring to form the points.
- Chain 1, pull the tail closed, cut with a long tail and sew to the top centre of the hood.
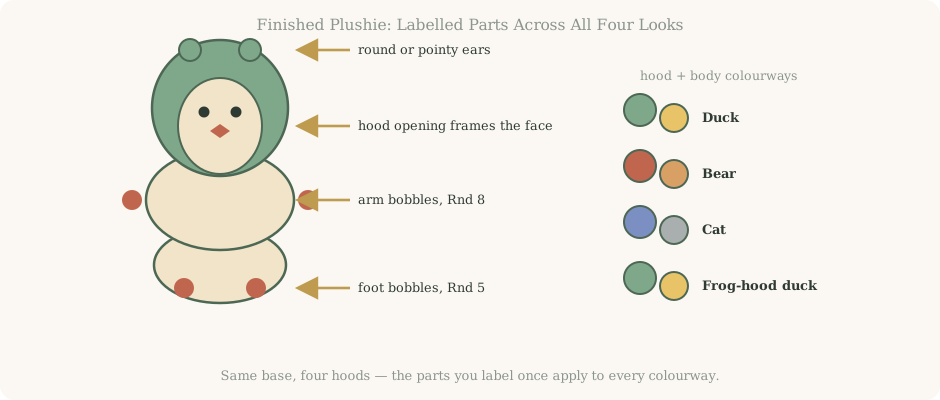
The face is five minutes of embroidery that decides the personality: a small diamond of orange satin stitches for a duck beak, a black “T” for a bear or cat nose, two or three short stitches per cheek for cat whiskers, and a couple of pink stitches under each eye for blush. Skipping safety eyes? A short horizontal black stitch on each side gives the same sleepy-eyed look. Knot every thread inside the head and hide the tails in the stuffing.
Four Animals, Troubleshooting and Care
Once the base is off your hook, the character is entirely up to the hood and face you choose.
- Duck / chick: yellow body, orange foot bobbles, embroidered beak, sleepy embroidered eyes or 5 mm safety eyes, green hood with round ears or plain.
- Apple-hood bear: beige body, red hood, beige round ears, green leaf on top, black “T” nose and mouth.
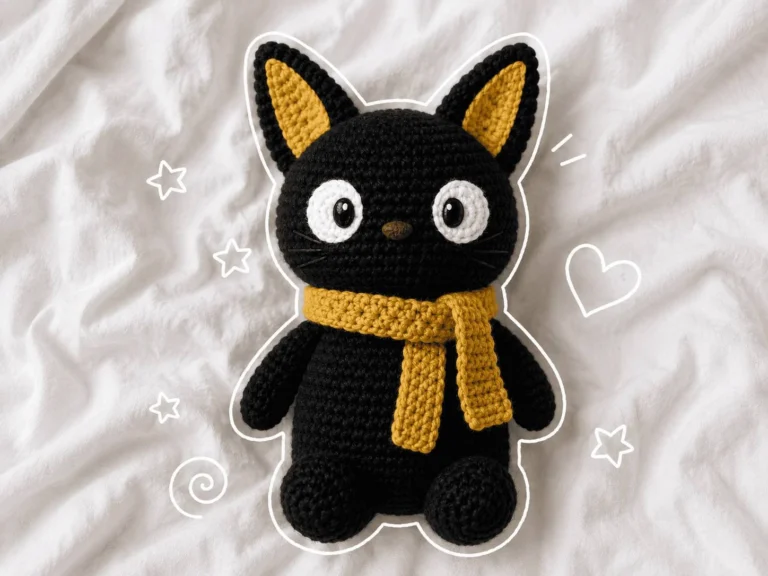
- Hooded cat: grey body, blue hood, grey pointy ears, black nose, whiskers, blush — a different build to a full standalone cat plushie, since it shares this same body-and-head base.
- Frog-hood duck: the yellow duck base under a green hood with two round frog-style ears.
| Problem | Likely cause | Fix |
|---|---|---|
| Bobble looks like a dent | Left on the wrong side | Push it to the front right after closing. |
| Colour-change jogs show | Normal spiral behaviour | Weave tails to the inside once cut. |
| Feet or arms misplaced | Miscounted sc before the bobble | Count 8/5/9 (feet), 7/7/8 (arms); frog back while cheap. |
| Head dents under hood | Under-stuffed crown | Stuff firmly at Round 19, in small pinches. |
| Hood opening too tight/loose | Row tension vs round tension | Fit before the chain border; block gently while damp. |
| Last round will not close | Tail pulled straight across | Weave through all six front loops, then pull and knot. |
Swipe the table sideways to see every column.
| Stage | Approx. time | Care note |
|---|---|---|
| Body + head (Rnd 1–20) | 30–40 min | Spot clean with cool water and mild soap; air-dry away from sun. |
| Hood (dome + rows + border) | 12–18 min | Block gently while damp if the opening needs reshaping. |
| Ears or leaf | 3–5 min | — |
| Face embroidery + finishing | 8–12 min | Glued eyes dislike soaking; let glue cure fully first. |
Swipe the table sideways to see every column.
Questions People Ask About Crochet Mini Plushie Hooded Animals
How big is the finished plushie?
What exactly is the bobble stitch used for the feet and arms?
Do I need safety eyes, or can I embroider them instead?
Is the hood optional?
Why does the hood use turned rows instead of continuous rounds?
Is this pattern different from a standalone crochet cat plushie pattern?
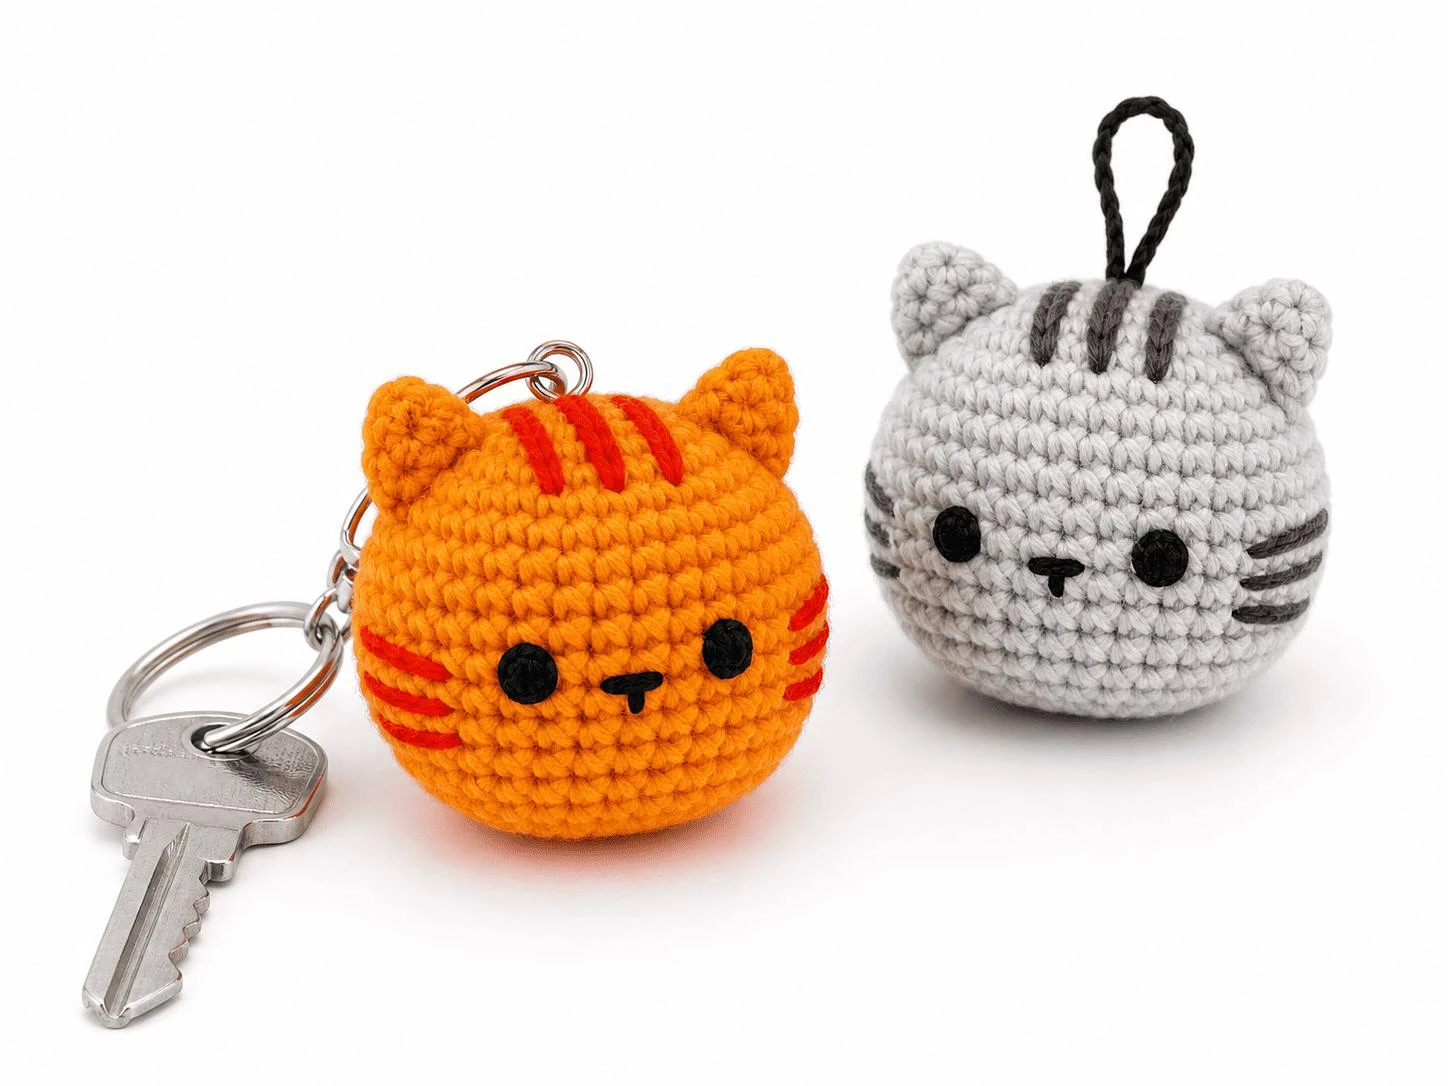
Can I turn the plushie into a keychain?
What is the fastest way to make several of these as gifts?
The Whole Crew, One Checklist
Picture that shelf again: a yellow duckling in a green frog hood, a beige bear under a red apple hood, a grey cat peeking out of a blue hood — one pattern, not a single sewn-on limb. Run through this before you trim the last tail.
- Magic ring closed tight; increases climbed 6 → 12 → 18 → 24.
- Two orange foot bobbles at Round 5, two arm bobbles at Round 8, pushed to the front.
- Body stuffed at Round 10; neck flared with the FLO increase at Round 11.
- Head worked at 24 sts through Round 17; eyes placed between Rounds 14 and 15.
- Head stuffed, decreased to 6, woven closed with no gap at the crown.
- Hood fitted with a neat face opening and chain border.
- Ears or leaf sewn symmetrically; face embroidered, blush added if you want it.
- Every tail woven in — and a second plushie already queued up on the hook.
One Base, Endless Hooded Characters
Save this pattern and let whatever is left in your scrap basket pick the next hood colour — the same twenty rounds turn into a duck, a bear or a cat by dinner time. Already tried a low-sew build on a different animal? The crochet octopus amigurumi pattern is a good next stop.