
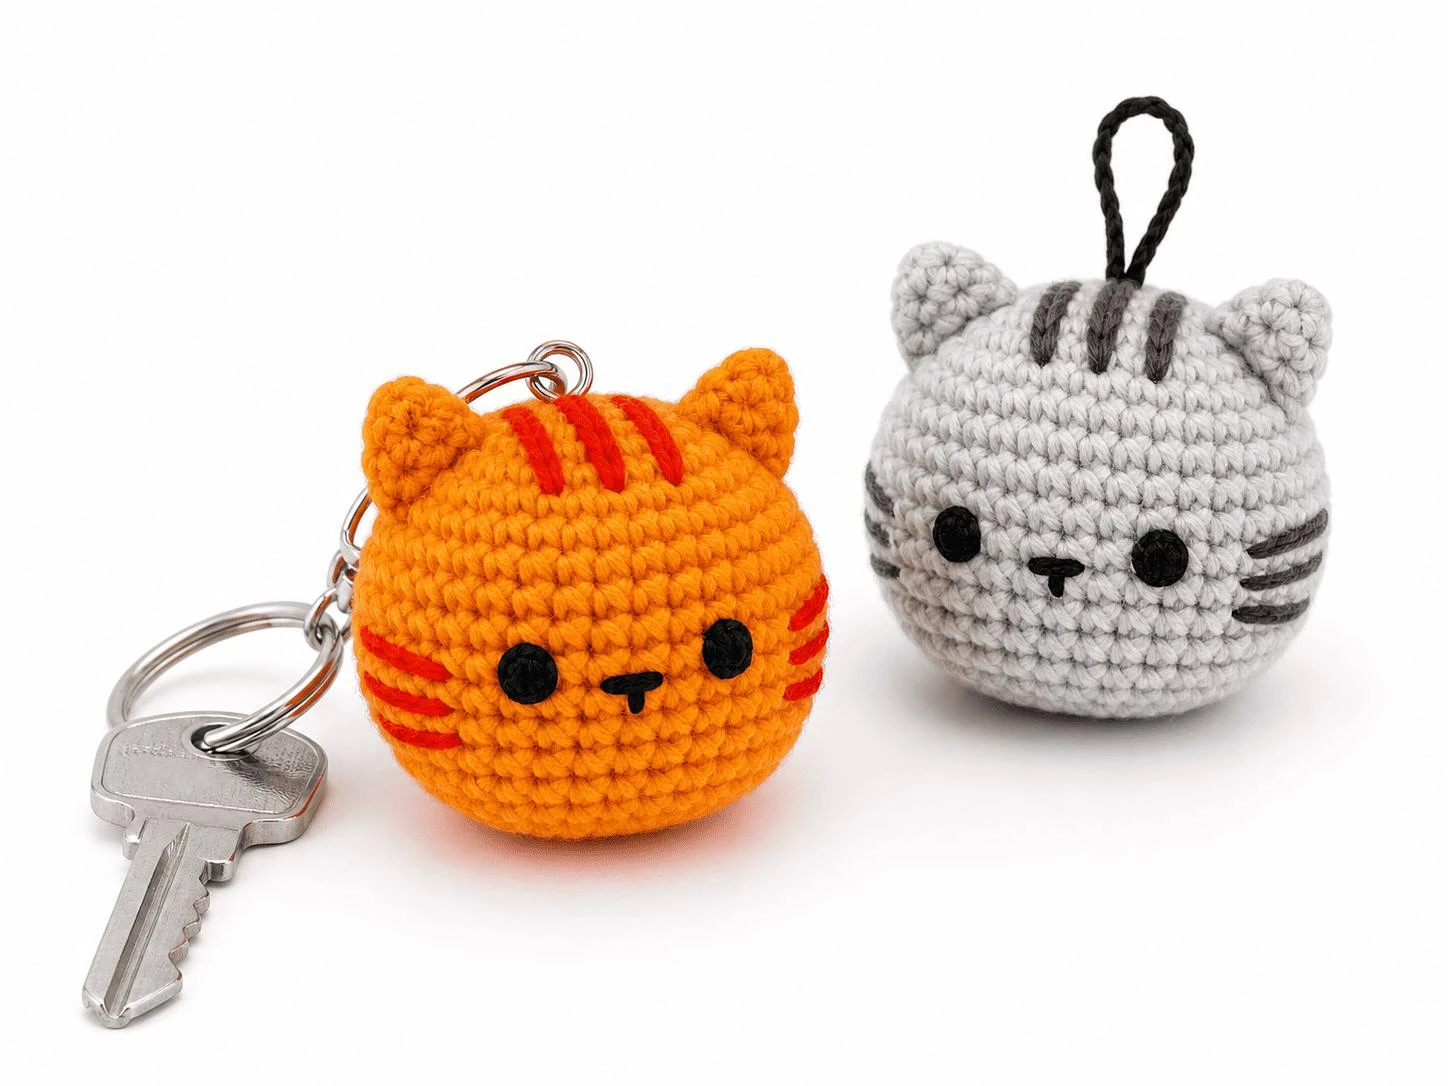
Crochet Mini Cat: A Tiny Amigurumi Cat Face You Can Finish in One Sitting
You want to make something today, in the time it takes to watch one episode of something. Most amigurumi patterns will not let you: a body, a head, limbs, an hour of assembly first.
This crochet mini cat skips all of that. It is a face and only a face — one round ball worked crown-first in a spiral, two three-chain ears, a couple of stitches of black thread for the personality. No seams to match, no torso to stuff.
What makes it worth repeating is the branch point at round seven. Work every round the same color and you get a solid cat in about forty-five minutes. Add a second color there and the same fifteen rounds grow a white muzzle blaze that widens two stitches at a time — the deliberate change that makes a plain amigurumi face look shop-shelf tidy.
Below is the complete round-by-round crochet mini cat pattern, both paths in full, with exact stitch counts and a diagram for every step a photo alone would not explain.
What Is a Crochet Mini Cat?
A crochet mini cat is a head-only amigurumi: a stuffed sphere worked in continuous single crochet rounds from a six-stitch magic ring to thirty stitches, decreased and closed, with two pointed ears and an embroidered face added last. No body, no arms, no pieces to sew together.
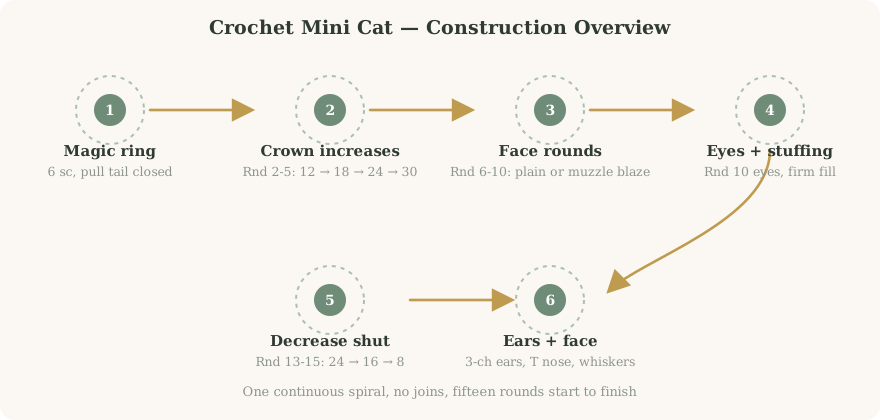
Every part of the anatomy comes from the same fifteen rounds:
- The crown — rounds 1–5, the increase ladder that turns 6 stitches into 30.
- The face — rounds 6–12, plain in one color or split into a muzzle blaze.
- The chin — rounds 13–15, three decrease rounds that fold the ball shut.
- The ears — two triangles, each just three chains and two stitches, sewn on after.
- The face detail — 8 mm eyes at round 10, a black “T” nose, two whiskers.
Every round is a plain sc, inc, or dec round, so this suits a first-time amigurumi maker as well as someone testing a yarn scrap — a miscounted round costs minutes, not an evening.
The finished head measures roughly 5–6 cm (2–2.5 in) across with 5-ply yarn and a 3.5 mm hook — a walnut with ears on. It works as a brooch, bag charm, or gift topper.
Materials & Tools
Everything below is a scrap-basket item. If you crochet regularly, you likely already have all of it except the eyes.
| Item | Amount | Notes |
|---|---|---|
| 5-ply yarn, main color | ~10 g | Beige, grey, black, or cream. |
| 5-ply yarn, white | ~5 g | For the muzzle blaze or a plain white cat. |
| Contrast scraps | tiny amounts | Optional ear accents or eye rings. |
| 3.5 mm crochet hook | 1 | Matched to 5-ply, for a tight fabric. |
| Stitch marker | 1 | Essential — no round join. |
| 8 mm safety eyes or glue eyes | 1 pair | Safety eyes classic; glue-back for discs. |
| Craft glue (all-purpose) | small amount | For the glued-eye-disc variation. |
| Stuffing | small handful | Firm fill avoids a lumpy shape. |
| Tapestry needle | 1 | For sewing and weaving in tails. |
| Black embroidery thread | a few strands | For the nose and whiskers. |
| Scissors | 1 | Several small cuts per cat. |
Swipe the table sideways to see every column.
Not sure what “5-ply” means on your label? Check the Craft Yarn Council’s yarn weight system first.
Abbreviations & the One New Technique
Every stitch here is one you already know if you have made amigurumi before. The only pattern-specific vocabulary is the repeat notation in every increase and decrease round.
| Abbreviation | Meaning | Where it appears |
|---|---|---|
| Rnd | round | Continuous spiral, never joined. |
| sc | single crochet | The main fabric stitch. |
| inc | increase | 2 sc in one stitch; builds the crown. |
| dec | decrease | 1 sc over two stitches; closes the chin. |
| ch | chain | The ear starts from a 3-chain base. |
| sl st | slip stitch | Closes the optional eye discs. |
| dc | double crochet | One tall stitch per ear; gives it its point. |
| (…)×6 | repeat 6 times | Every increase and decrease round. |
Swipe the table sideways to see every column.
The one technique this pattern teaches, if new to you, is a mid-round color change: on the last pull-through of the stitch before the change — the moment you would normally finish in the old color — finish with the new color instead.
Getting the Size You Want
Stitch counts never change — every version tops out at 30. What changes the finished size is yarn weight and hook, matched so the fabric stays dense enough to hold stuffing.
- Pick your yarn weight first, not your hook — the cat scales directly with the yarn.
- Match the hook one or two sizes below the yarn band’s recommendation, for a firmer fabric.
- Swatch rounds 1–3 and check no magic-ring hole is visible when stretched gently.
- If gaps show, drop a hook size and re-swatch rather than fighting tension by hand.
- Measure the head at its widest point (round 10–11) before adding ears.
| Yarn weight | Hook | Approx. finished width |
|---|---|---|
| 3-ply / fingering | 2.5 mm | 3.5–4 cm (1.4–1.6 in) |
| 5-ply / sport (as written) | 3.5 mm | 5–6 cm (2–2.5 in) |
| DK / light worsted | 4 mm | 6.5–7.5 cm (2.5–3 in) |
| Aran / worsted | 5 mm | 8–9 cm (3.1–3.5 in) |
Swipe the table sideways to see every column.
The Crochet Mini Cat Pattern, Round by Round
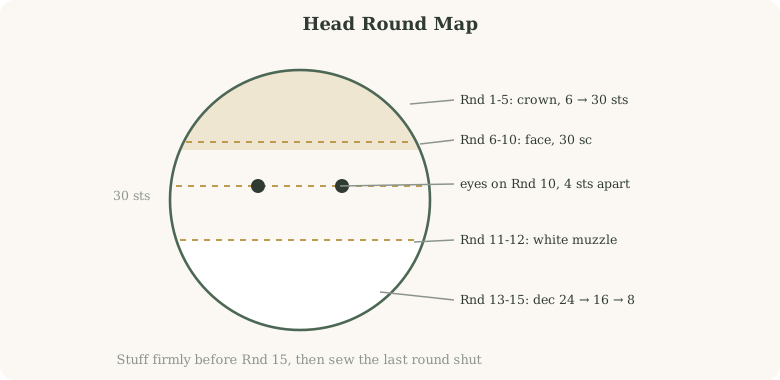
Work the whole head in a continuous spiral, no joins. Clip a stitch marker into round 2 and move it up every round.
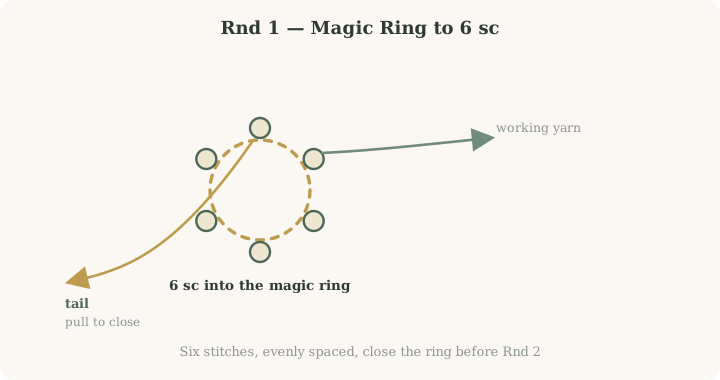
Rounds 1–6: The Crown
Every version starts identically: six stitches added per round until the disc curls into a shallow bowl — the top of the head.
- With the main color, make a magic ring.
- Rnd 1: 6 sc into the ring (6 sts), then pull the tail to close the ring completely.
- Rnd 2: 6 inc — two sc into every stitch (12 sts). Clip your stitch marker into the first stitch of this round.
- Rnd 3: (1 sc, inc) ×6 (18 sts).
- Rnd 4: (2 sc, inc) ×6 (24 sts).
- Rnd 5: (3 sc, inc) ×6 (30 sts).
- Rnd 6: 30 sc, one in every stitch, no increases.
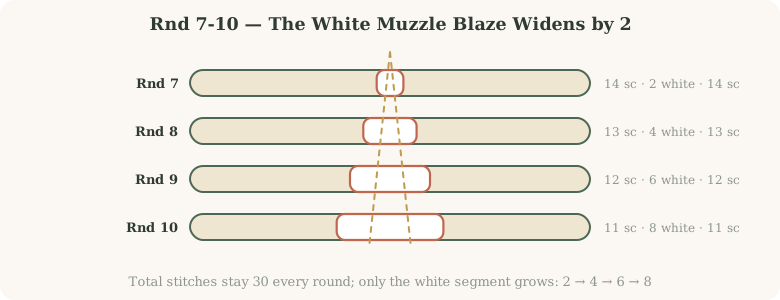
Rounds 7–12: One Color or the Muzzle Blaze
After round 6, the pattern splits: the one-color cat works 30 sc every round to 12; the two-color cat grows a white blaze widening two stitches per round, then turns fully white for the muzzle.
| Round | Main color | White | Main color | Total |
|---|---|---|---|---|
| Rnd 7 | 14 sc | 2 sc | 14 sc | 30 |
| Rnd 8 | 13 sc | 4 sc | 13 sc | 30 |
| Rnd 9 | 12 sc | 6 sc | 12 sc | 30 |
| Rnd 10 | 11 sc | 8 sc | 11 sc | 30 |
| Rnd 11–12 | — | 30 sc, all white | — | 30 |
Swipe the table sideways to see every column.
How to change color cleanly
- Work up to the counted stitch — round 7’s is the 14th sc.
- Finish that stitch’s last pull-through with the new color.
- Work the white stitches — 2, 4, 6, then 8 — then change back at the count.
- Drop the unused color; do not carry it inside, or it will shadow through.
- After round 10, cut white. Change to white at round 11, cut main color, work 11–12 in white.
Rounds 13–15: Closing the Head, Eyes & Stuffing
The last three rounds fold the ball shut, and this is when the eyes go in. Their spacing is the difference between a face that reads “cat” and one that reads as a blob.
- Rnd 13: (3 sc, dec) ×6 — consumes 30 sts, produces 24.
- Rnd 14: (1 sc, dec) ×8 — consumes 24 sts, produces 16.
- Eyes: insert 8 mm eyes on round 10, 4 stitches apart, or sew eye discs first and glue the eyes to those.
- Stuff firmly, in small bits, before the opening narrows too much.
- Rnd 15: 8 dec — consumes 16 sts, produces 8. Long tail for sewing.
- Sew shut: weave the tail through the front loops of the remaining 8, pull gently, knot inside, bury the tail.
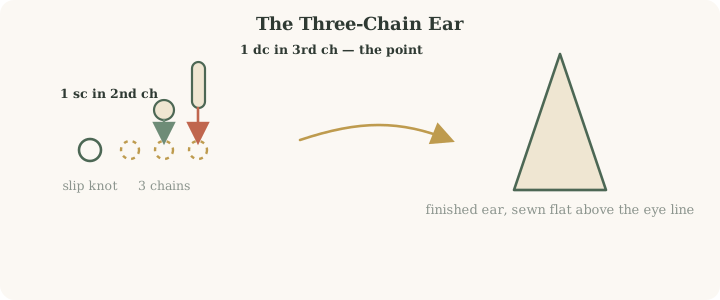
The Three-Chain Ear
The shortest recipe in the pattern — a slip knot, three chains, two stitches. The single dc gives the ear its point; two sc in the same spot would give a bump instead.
- Slip knot with the ear color, then 3 chains.
- In the 2nd chain from the hook, work 1 sc.
- In the 3rd chain, work 1 dc — the tall stitch beside the short one makes the triangle point.
- Cut with a long tail, repeat for the second ear.
- Sew both flat onto the crown, above the outer edge of each eye, mirrored left and right.
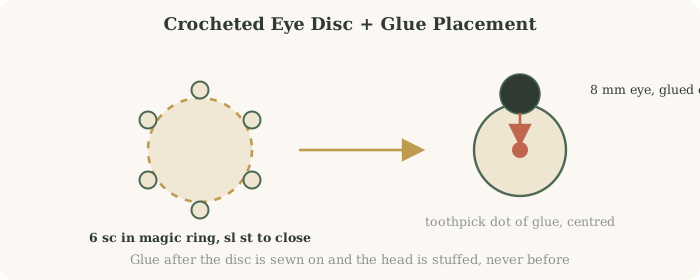
Optional: Crocheted Eye Discs
Wide-eyed, cartoon-style cats get their look from a crocheted disc behind each eye instead of a safety-eye post — optional, but the fastest way to read as kawaii.
- Magic ring, 6 sc into it, then sl st into the first sc to close. Cut a long tail; make two.
- Sew both discs onto the face along the round 10 line, 4 stitches apart.
- Dot each 8 mm eye’s back with glue, press onto the disc center, hold a few seconds.
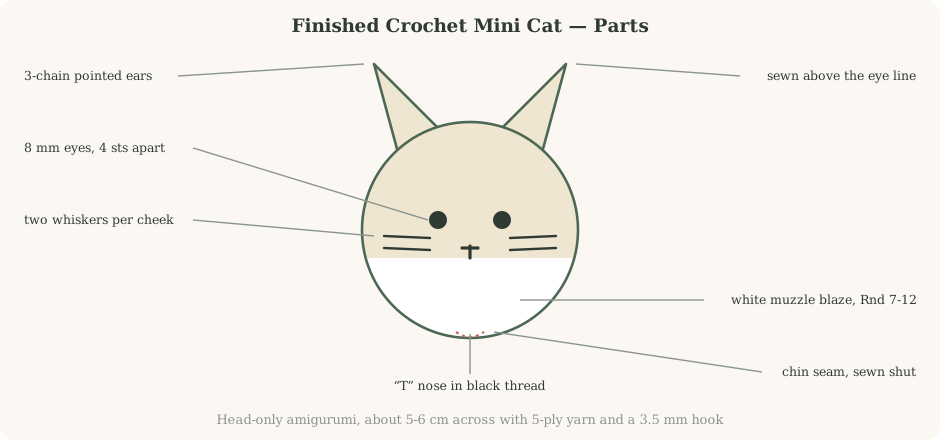
Embroidering the Face
With black thread, the ball becomes a cat. Keep it to two elements — nose and whiskers — using short lengths so nothing tangles inside.
- Nose: one short vertical stitch centered below the eyes, then a horizontal bar across its top — a small “T”.
- Whiskers: two short horizontal stitches on each side of the face, level with the nose.
- Bring the needle out through the crown or the seam, knot, and hide the tail inside.
- Stand the cat upright and step back before trimming — symmetry reads from a distance, not up close.
Troubleshooting, Variations & Care
Troubleshooting
| Problem | Likely cause | Fix |
|---|---|---|
| White blaze off-center | Color changed on the wrong count | Recount the round-7 stitches; mark each edge of the patch. |
| Stair-step jog at color changes | Normal spiral behavior, worsened by loose tension | Finish the last pull-through with the new color; tug the tail snug inside. |
| Head feels lumpy | Stuffing added in one large ball | Stuff in small pinches, firming the forehead and chin last. |
| Ears flop or sit unevenly | Too few loops sewn, or mismatched heights | Pin above the outer eye edge, sew through the full base, compare from the front. |
| Glued eye pops off | Too little glue, or handled too soon | One toothpick dot of glue, press 20 seconds, rest an hour. |
| Last round will not close | Tail woven across instead of around | Weave through all 8 front loops, pull gently, knot inside. |
Swipe the table sideways to see every column.
Variations
- All-black cat: skip the color change, work one-color in black, gold eye ring for contrast.
- Cream cat, brown ears: solid cream head, ears crocheted in contrasting brown.
- Bag charm: add a short chain loop at the crown before weaving in the final tail.
- Brooch or magnet: glue a pin back or flat magnet to the closed chin seam.
| Version | Approx. time |
|---|---|
| One-color cat | 45 minutes |
| Two-color muzzle blaze | 60–75 minutes |
| Add crocheted eye discs | +10 minutes |
| Ears, sewing, and face embroidery | +15 minutes |
Swipe the table sideways to see every column.
Care
Dust with a soft brush or lint roller. For an actual clean, spot-wash with cool water and mild soap, then air-dry fully. Glued-eye cats should never be soaked or machine washed.
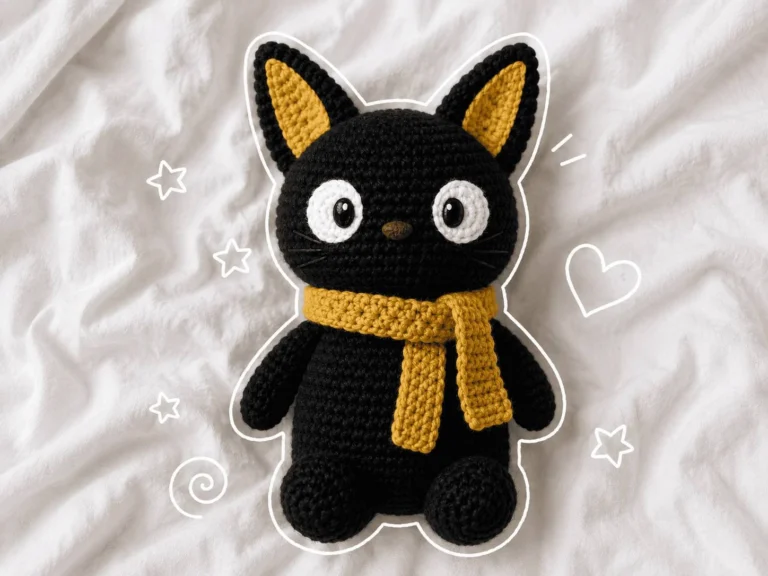
Enjoyed the head-only build and want a full-body cat next? The crochet black cat plushie pattern on this site uses the same amigurumi basics, scaled into a full plush toy.
Frequently Asked Questions About the Crochet Mini Cat
How big is the finished crochet mini cat?
Can I skip the color work and make a solid-color cat?
What do the stitch counts in the muzzle blaze table mean?
Safety eyes or glued eyes — which should I use?
Why does the ear use a double crochet instead of two single crochets?
My stitch counts are correct but the face still looks “off”. What’s wrong?
How much yarn do I actually need for one cat?
Can I make this pattern without a stitch marker?
Your Cattery Is Open — Final Checklist
You wanted something finished today, not next weekend. Run through this list before you trim the last tail — if every line is true, your crochet mini cat is done and ready for a name.
Quick-start checklist:
- Magic ring closed tight with 6 sc, crown climbed 12 → 18 → 24 → 30.
- Path chosen: one-color 30 sc for rounds 6–12, or the two-color muzzle blaze plus white band.
- Color changes made on the counted stitch, tails woven to the inside.
- Decreases worked 24 → 16 → 8 with the head stuffed firm before the last round.
- Eyes placed on round 10, 4 stitches apart — inserted or glued onto discs.
- Last round woven shut with a long tail, the hole fully hidden.
- Ears sewn above the eye line, standing proud and mirrored left to right.
- “T” nose and two whiskers per side, every knot buried inside the head.
One Cat Is Never Enough
Save this pattern, pull the next scrap from your basket, and let the color decide the next cat — the grey tabby with the white blaze is only one ball of yarn away.

One Comment